 MAGNESIA
ad Sipylum
(1)
MAGNESIA
ad Sipylum
(1)

![]() The Scenario
& Background
The Scenario
& Background
![]()
Based upon the description from Livius And Appian, we designed a scenario to play Magnesia. Click here for the scenario and the historical background of the battle.
We played this battle on the 10th of june 2006 at Murphy's Heroes open dag in Delft, Netherlands. With me were Karel van den Arend, Dennis klinkenberg and Don. During the Open day we were joined by Martin Vlaanderen and Therry van der Burgt.

Notice all players standing; a sure sign of tension
left-to-right:Martin,Don,Therry,Dennis,Karel
![]()
![]() The Setup
The Setup
![]()
![]() Romans
(taken from the HatPW supplement) and Pergamum (AoA successors)
Romans
(taken from the HatPW supplement) and Pergamum (AoA successors)

| # | Type | Points |
| Left | ||
| 4 | Roman Cavalry (LSM) | 62 |
| Centre | ||
| 4 legions, each containing: | ||
| 8 | Velites (javelins, SH, LSM) | 4x84 |
| 12 | Hastati (pilum, LSH, LA, LSM) | 4x156 |
| 12 | Principes (drilled with pilum, LSH, LA, LSM) | 4x192 |
| 6 |
Triarii (drilled, stubborn, thrusting spear, LSH, LA, LSM) These are combined with the triarii from a second legion |
4x90 |
| Characters | ||
| 1 | Army General | 150 |
| 1 | Army battle standard | 85 |
| Right | ||
| 1 | Sub general (AoA successors) | 150 |
| 16 | Thureophoroi (AoA Successor Peltasts, SH, thrusting spear, LSM) | 143 |
| 8 | Roman Cavalry (throwing spear, LSM) | 135 |
| 8 | Pergamum Cavalry (AoA successors light cavalry, javelins, LSM) | 160 |
| 8 | Trallian and Cretan cavalry (AoA successors light cavalry, javelins, LSM) | 160 |
| Camp | ||
| 16 | Macedonian Phalanx (AoA successors levy phalanx, LSM) | 95 |
| 8 | Thracians (AoA successors with rhompaia, LSM) | 87 |
| 1 | African Elephant (AoA sucessors) | 115 |
| 3,500 PTS | ||
Triarii
![]() Antiochus
III based upon the AoA successor list. (Use the AoA list Alenxander and his successors until the successor book is
released.)
Antiochus
III based upon the AoA successor list. (Use the AoA list Alenxander and his successors until the successor book is
released.)
| # | Type | Points |
| Characters | ||
| 1 | Army General (Antiochus) | 175 |
| 1 | Army Battle Standard | 80 |
| left | ||
| 10 | Galatians (Barbarian light cavalry, warband, LSM) | 145 |
| 8 | Royal Guard Cavalry (Kontos, Barding, LSM) | 295 |
| 10 | Cataphracts (AoA Cataphracts list, LSM) | 285 |
| 1 | Indian Elephant | 158 |
| Centre | ||
| 10 | Cappadocians (peltasts, javalins, SH, LSM) | 55 |
| 25 | Levy phalanx (HA, SH, LSM) | 165 |
| 25 | Levy phalanx (HA, SH, LSM) | 165 |
| 25 | Levy phalanx (HA, SH, LSM) | 165 |
| 20 |
Galatians (barbarian warriors, warband, LSM) both small Galatians units are combined into one unit |
135 |
| Right | ||
| 1 | Indian Elephant | 158 |
| 10 | Cataphracts (AoA Cataphracts list, LSM) | 285 |
| 8 | Agema (royal guard cavalry, kontos, LA, wedge, LSM) | 263 |
| 12 | Argyraspides (hypaspists, thrusting spear, LA, Sh, light troops, LSM) | 219 |
| 8 | Dahae (light cavalry, skirmish, bow) | 144 |
| Vanguard Left | ||
| 9 | Cyrtian & Elymarean slings & bows (Levy Skirmishers with bow) | 36 |
| 10 | Catreati (Levy Skirmishers with javelins) | 30 |
| 10 | Catreati (LevSk Skirmishers with Javelins) | 30 |
| 9 | Trallian slings (Skirmishers with slings) | 36 |
| 2 | Scythed Chariots | 150 |
| 12 | Careans & Cilicians (Peltasts with Shield and javelin, LSM) | 99 |
| 8 | Cretans (Skirmishers with bow) | 40 |
| 16 | Misc. Troops (Levy skirmishers) | 48 |
| Vanguard Right | ||
| 16 | Cretan & Tralles Peltasts (Peltasts, SH, javelins, LSM) | 127 |
| 10 | Mysian bows (Skirmishers, Bow) | 50 |
| 9 | Cyrtian & Elymarean slings & bows (Skirmishers, Slings) | 36 |
|
3,500 PTS |
||
The armies were designed to give each side 3,500 pts and also keep the ratio of
the troops as historical as possible. Some troops were downgraded and other
upgraded with playability in mind. We also did not have camel miniatures. It
took me till the last day before the game to finish painting the last Republican
Roman unit.
Resulting in more than 500 models on the table!
We played this scenario and here is the result.


Birdview of the battlefield
move cursor over the picture to review details
|
 |

Thureophoroi (navigator)
| The Skirmish combat |
| The Seleucids had an awful lot of skirmishers. They formed a front line covering their whole deployment zone. This was a problem further on the game, for they could not deploy their heavy troops well enough. But they had a lot of missile troops this way. |
| Missile fire from the Seleucid right resulted in many casualties for the Roman/Pergamese cavalry. This Roman wing was almost destroyed in the first rounds. |
| Instead of waiting to do missile damage, the skirmishers on both sides were forced to get into close combat quickly with each other. After this the field was open for the regular troops to advance. |

Cataphracts (Old Glory)
| The Roman Right |
| Then, at one inattentive moment, the Seleucids placed there advancing scythed chariots within charge range of the Romans. They took the opportunity as favour from the gods, and charged. Mayhem followed. |
| The chariots panicked, and the next turn took the Royal Guard with them. A cascade of panics resulted. Although the Seleucids rallied the chariots, they were were too isolated to do real damage in this game. |
| The Seleucid Cataphracts got charged after an overrun of the
skirmish screen. They lost the battle on rank difference, and threw a 10
on the LD test.....off the table they went... The Romans were winning here, but it cost them almost their entire right wing. Was this good enough? |

(Seleucids in purple, Romans in Blue, Pergamese in Orange, Reserve in Green)
| The Centre |
| The Seleucid phalanx in the centre waited for the flank attacks to evolve. |
| The Romans decided to try to counter the flank attack with brute force on their left wing and sent three legions to that side. One legion was sent to the other flank, where the Pergamese were involved into a hard battle and could use a little help. This way they refused the center of Antiochus army, that had been held back a little. |
| Antiochus' army rushed into the gap the Romans had made in the centre. The reserve from the camp was called in to reinforce the Roman centre to slow down the phalanx attack . This was not historical at all, but the Romans decided to do this anyway, probably due to the knowledge gathered from this very historical battle! |
| The Hannibal supplement manipular rules are strong. Not only LD rerolls and adding extra rank bonus and free command groups, but also the switching of units, combined with the pilum make them very strong. Every other turn they can re-use the strength of the pilum again. Lesser phalanx units have a problem fighting against the Republican Romans now. |
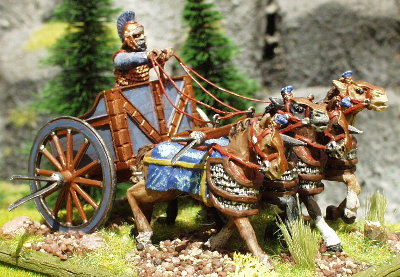
Scythed Chariot (Old Glory)
| The Roman left |
| The four Roman cavalry models on the left were facing a tremendous amount of Seleucid cavalry. They bravely charged the wedge, but were cut to pieces. The wedge pursuing into a roman legion were stopped and turned the next turn. They also took other units with them in their flight. In the end they all rallied though. |
| On the Seleucid right the Cataphracts were accompanied by the elephant. This was a very dangerous combination But the brave Roman legion held on long enough, though they could only kill elephant crew. Both sides lacked rank bonus due to the elephant. Only after our elephant joined battle, they managed to kill two Cataphracts. At that time they also got a Roman unit in the flank. |
![]()
![]()
![]()
|
|
|
